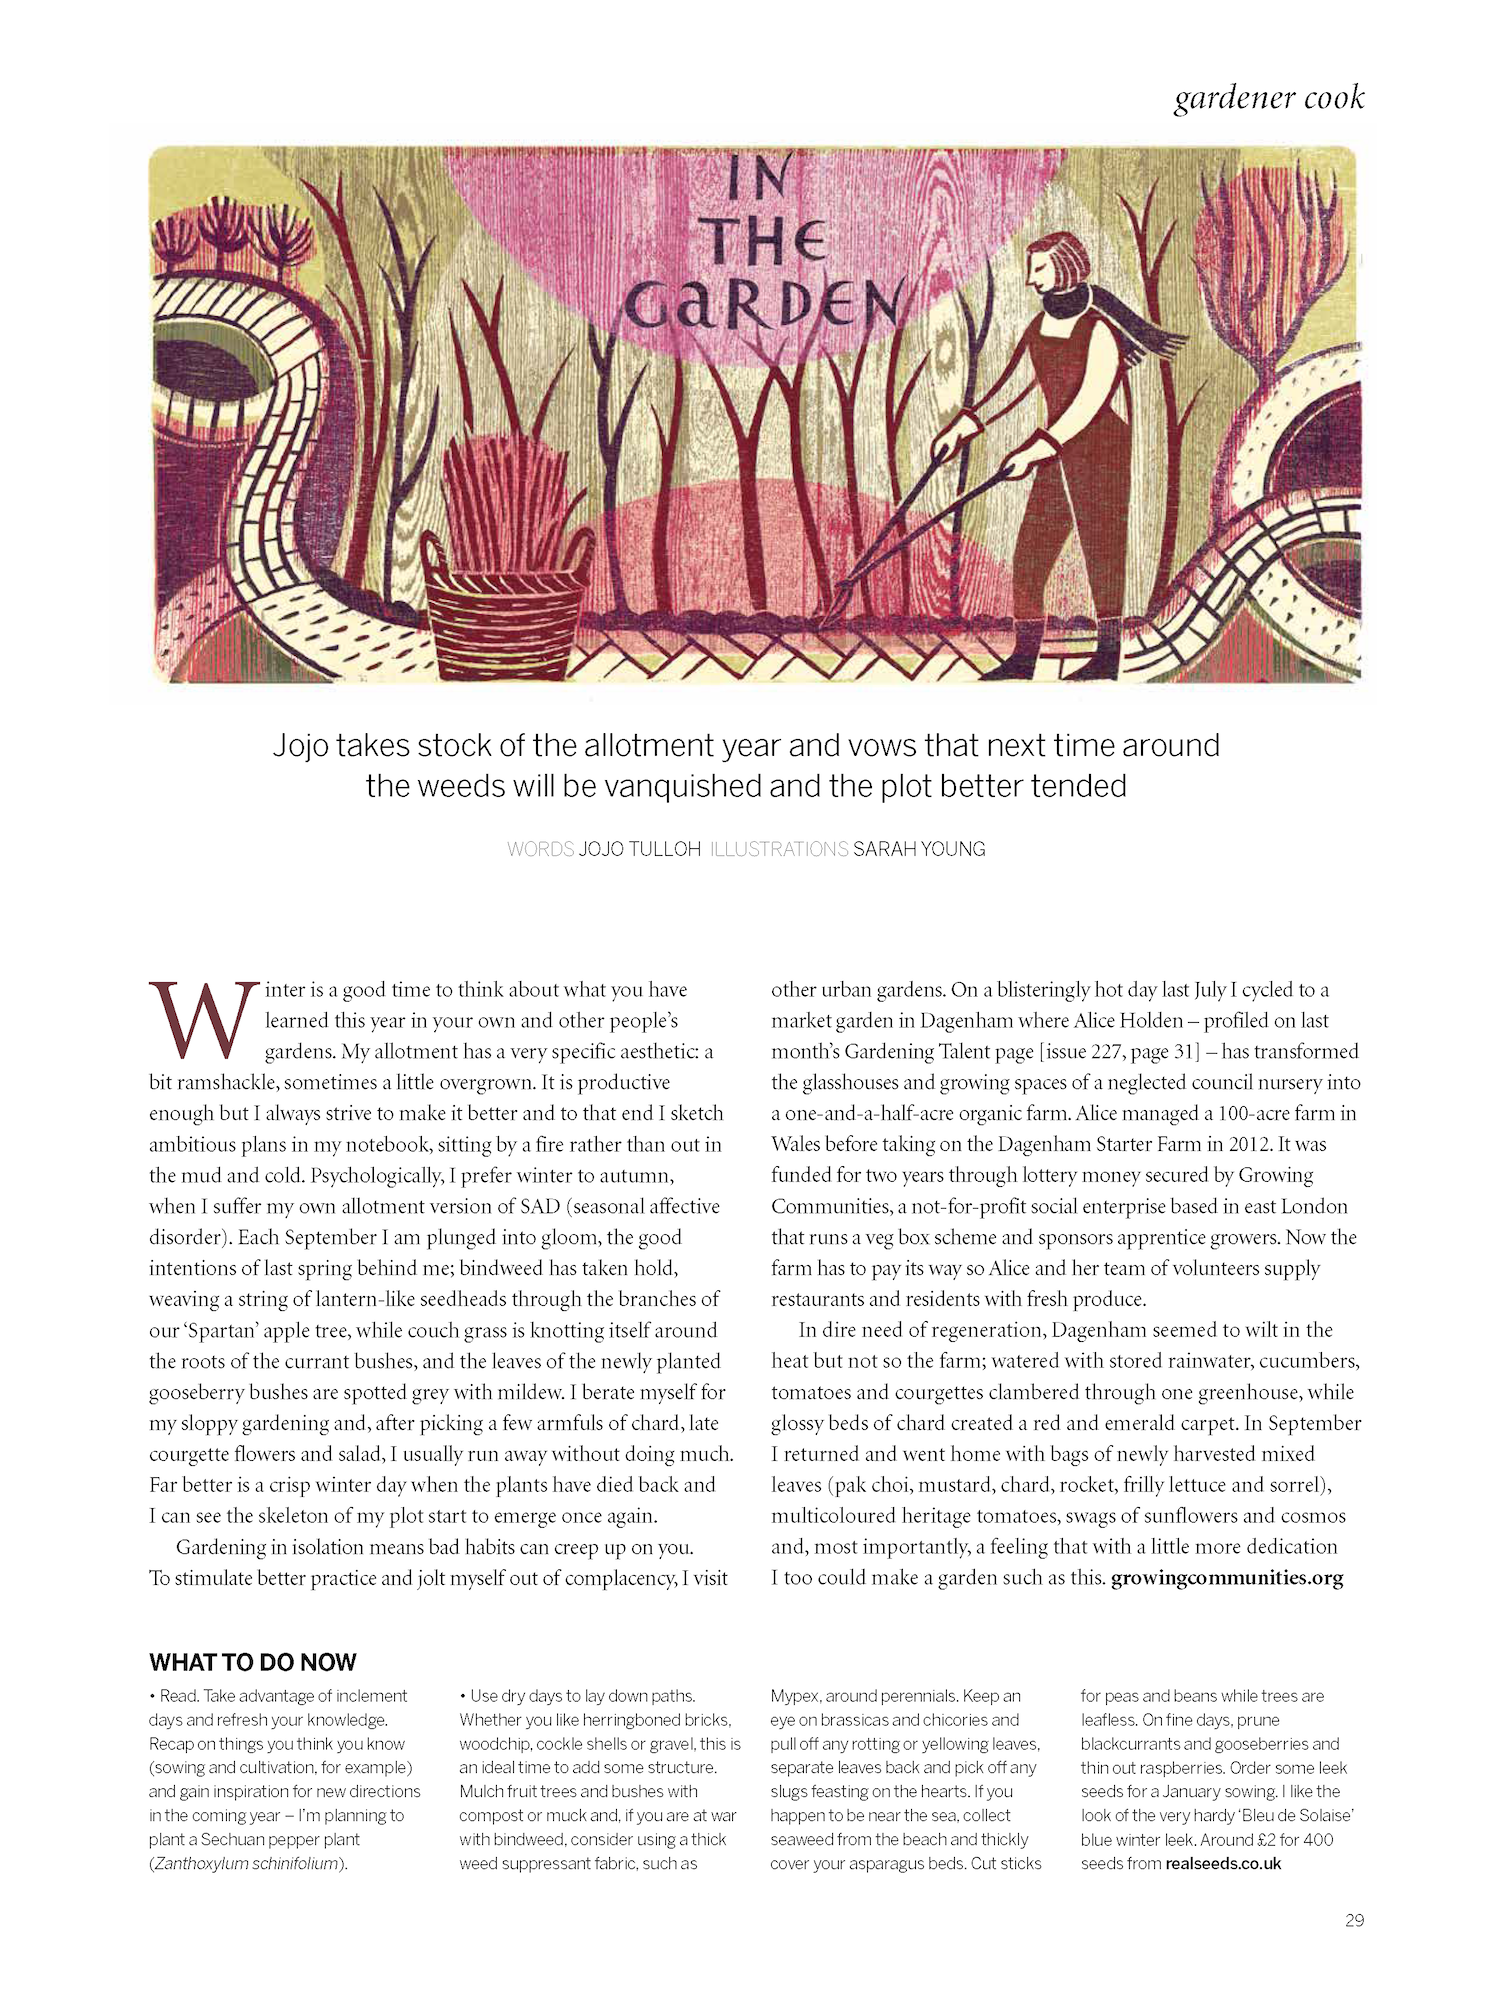
Monday, 25 January 2010

Camping out under a harvest moon


To get myself through the grey days at the start of the year I  dream of summer (past and future). This August we camped on a friend’s farm just below Dunkery Beacon, the highest point on Exmoor. We pitched our tents in a wide, open field with the moor stretching up and away behind us. The first thing we did was dig out a large rectangle of turf for our fire, making sure to stack the sods neatly so that we could replace them when we left and leave the field as we found it. We edged the fire pit with some large flat stones and whilst we waited for the fire to burn down to cooking height we go out tents up. The first night we cooked a flattened chicken that I marinated before we left home. Saffron and chopped red onion are combined with the more usual lemon and oil mixture to add a Persian feel to an English summer evening.  Whilst we ate our chicken we watched a huge harvest moon, opaque and orange swim out from behind the trees at the edge of the field and glide upwards.


Grilled chicken with saffron and lemon
Ingredients
1 free range chicken
1 red onion chopped finely
a pinch of saffron threads crushed and steeped in a 1 tbsp of boiling water
3 tbsp olive oil
juice of 1 lemon
salt and pepper
long green pepppers for grilling


Cut the chicken down its breastbone and lay it on top of a chopping board. Using your fist break the joints and flatten the chicken out. In a large tupperware combine the marinade ingredients and add the chicken, mix well and refrigerate until you are ready to use it. For campers a cool box should be fine.
When the coals are glowing nicely put a grill over the fire and allow any residue to burn off. Place the chicken skin side down and cook for a good ten to fifteen minutes on each side you can cook a pot of rice alongside the chicken and some long green peppers. We ate the chicken and the peppers torn up in great oval flat breads from the Turkish bakery.


Saturday, 16 January 2010

Are you a boiler or a slicer?


Late January means one thing to lovers of home made marmalade - Seville season. The sour, pippy fruits that make such delightful breakfast fare are around for such a short time that one must snap them up the moment one sees them. So like so many other marmalade fiends  I am currently overseeing a  bubbling pan of peel and filling the house with wonderful citrus oil steam. I am taking advantage of the hour and half needed to get the peel really soft to write this up but when I add the sugar I will be giving the pan my full attention.

Marmalade makers can be divided into two camps - boilers and choppers.  Some boil the fruit whole and then slice while others slice first, soak then boil. It depends what kind of marmalade you like I think the initial slicing results in a fresher tasting, lighter conserve. Actually now I think about it, it might be three camps if you count the hand chopping versus food processor debate. I cut my peel by hand it takes time but good marmalade is worth it and gives you greater control over the size of peel in your marmalade.

 I always make sure to buy twice as many marmalade oranges as I need. They freeze beautifully and by June when I have run out of marmalade I boil them up whole up and make another batch (the peel goes a bit spongy making it harder to chop). This means that by the end of the year I am a member of both the boiler and slicer camps. Tonight I am chopping, boiling, pouring, skimming, testing and praying it will turn out to be a clear, wobbly jelly. It may sound strange but spending a few hours in a warm, steamy kitchen listening to Edith Wharton's The Custom of The Country on Radio 4 is one of the most delightful evenings I can imagine. Will my marmalade set? You will have to wait til tomorrow to find out.

Sunday morning
Well I don't like to boast but my marmalade  has set beautifully, a glorious amber with the slices suspended as if by magic with a lightly wobbling jelly. I won't give you a recipe as everyone has their own, I use Marguerite Patten's Sweet Seville Marmalade recipe in her fantastic book on preserving (part of Grub Street's excellent The Basic Basics series).  My only advice would be boil hard, use a thermometer and test early, my marmalade reached its setting point at just 17 minutes (once past the setting point it will never set no matter how long you boil it).

Tuesday, 5 January 2010

Steak and vine


It’s hard to think of cheering jobs in January. Everything is frozen and wilted and Spring seems a long way off. One job that does hold out the prospect of happier, sunnier days is pruning my vine back. I found an old vine strangled by brambles but still growing at the very back of my plot. After a hard pruning I trained it over a little structure to the left of my shed. As well as producing a mass of tender green leaves for making stuffed vine leaves it provided heavenly glaucous shade in more scorching summer moments. It also provides the makings of great barbecue as the vine trimmings can be used as fuel.


Cooking over vine twigs is nothing new. On the continent vineyard workers have long known that the dry resinous stems of the vine give a wonderful taste and aroma to meat grilled over them. This summer we cooked a t-bone steak over vine twigs in the back garden. It was an evening to remember. The air was warm and clear and after building a fire with ordinary coals I let them sink down to a warm glow before putting on  the vine twigs and then the steak. The twigs flared up quickly with bright orange flames then glowed red in a delicate mass before collapsing into a cloud of grey ash. The latter I later fed back into the soil (wood ash is very good for soil). We ate the steak with freshly grated horseradish mixed with cream and black pepper and some waxy yellow charlotte potatoes dug that afternoon.

 After reading the great herbalist, soil doctor and anthologist of gypsy lore, Juliette de Bairacli Levy’s entry on the vine in her indispensable, Illustrated Herbal Handbook for Everyone, I will now be picking and eating the vine tendrils whenever I visit my allotment. She makes high claims for the vine which she calls the “supreme food and medicinal herb” and whose leaves she describes lovingly as being like “cool, green, healing human hands”. According to Bairacli-Levy the vine is a general tonic for the whole body but in particular anaemia, infertility, impure blood, eszema, lymphatic ailments, dystentery and constipation.

She goes on to say that “when the human body has become sick almost beyond reasonable hope of recovery, there is still, to my mind, one recourse: for the patient to retire to the neighbourhood of some vineyard where grape are cultivated by natural methods and there to follow a grape cure, living only on the fruit (with a few vine leaves and tendrils also) and drinking only pure water and perhaps fresh goat or sheep milk.” It may not have been scientifically proven but it’s encouraging to think I have such powerful medicine readily at hand

Monday, 4 January 2010

My Compost Shame


It's time to confess all. I am absolutely  rubbish at making compost.   So far all I've managed to make is a giant stack of stalks and mould. I could blame my husband but that would be too easy. He was the one who made the bin but when he nailed the pallets he neglected to leave one side open for easy turning. Actually I probably wasn't very clear about just what it was I wanted.  A few years in I tried hacking a hole in the side with a rusty old saw but that didn't really work. What I have now is a top loading square bin to which my neighbours happily add their woodiest waste ( lots of cabbage stems and sweetcorn stalks) whenever my back is turned. An ancient vine and a mass of convolvulus have grown up over it making it hard to get too. It's dispiriting and as a result I don't really bother using it. I can't get down my allotment every day or even every other day so kitchen waste builds up quickly. In summer it rots and even when I do go I invariably forget to take the reeking bucket down. This may have something to do with the fact that carrying a pungent slop of half rotted vegetable matter on your back whilst cycling is pretty unappealing.

Not being able to crack the secret of great compost may not seem such a dark and dirty secret but as someone who loves both cooking and gardening it has always seemed singularly shaming that at the place where those two worlds meet (the turning of kitchen scraps into rich, crumbling, soil-enriching humus) I should be such an abject failure. But no more, our new house has enough garden to house a modest compost bin. I have turned my back on the plastic Dalek like bins which seem to make a tower of woody waste. Instead, in the spirit of the allotment I am doing it on the cheap, by making a circular bin of chicken wire held up by posts of salvaged wood then lined with cardboard. It will be a small and hopefully not too smelly bin popped out of sight in a corner of our back garden. This may not seem much of a New Year's resolution but if I can  produce something worth putting back into my garden I will finally feel less of a kitchen gardener imposter. With the help of a Christmas present (Joy Larkcom's classic "Grow Your Own Vegetables" which has a long and very clear compost chapter) I hope to wash away the year's of non-composting shame.

Saturday, 19 December 2009

Spicy aubergine (brinjal) chutney for Christmas


Every morning in December my two older children open their Advent calendars and then jump up and down shouting out the days til Christmas. However  well you've done with present buying this is not that restful a start to the day. If like me your present list is still only half complete then why not give up the shops and try cooking up some presents instead? I would much rather be in a warm kitchen listening to the radio than shouldering my way through the Christmas throng. This year I’ve made lemon and ugly lime marmalade (it's in my book). It’s a good Christmas present for marmalade fiends as they have invariably run out of the homemade stuff by December. I've also made my some brinjal chutney. It's a rich, spicy chutney that goes well with Indian food but is also delicious in a sandwich with a good hard cheese. It makes about 5 jars.


INGREDIENTS


1 x  5cm square tamarind pulp (soaked in about 100ml of kettle hot water)
4 (roughly 750 g) aubergines (diced)
2 tsps sea salt
6 tbsp vegetable oil (mustard oil would be perfect if you can get hold of it)
3 long red chillies (seeded and finely chopped)
6 cloves of garlic (peeled and finely chopped)
1 thumb of ginger (peeled and finely chopped)
2 tsp cumin seeds
1 scant tsp fenugreek
1 tsp coriander
1 tsp fennel seeds
8 fresh curry leaves (optional)
2 whole dried red chillies
2 heaped tsps black mustard seeds
1 tsp turmeric
400ml distilled malt vinegar
150g dark brown sugar

5 clean jam jars (save up your shop bought pickle jars)
a little oil to seal the top

A couple of hours before you are ready to start making the chutney place the diced aubergines in a colander and sprinkle over some sea salt. Grind the cumin, fenugreek, fennel and coriander. Place in a bowl along with the other spices and the curry leaves. Rub the tamarind through a sieve into another little bowl using a wooden spoon. Scrape the pulp off the bottom of the sieve. You should have a good 2 or 3 tablespoons of glossy brown pulp. You are ready to start making the chutney.

Heat the oil in a large non-reactive saucepan. When hot add the aubergine and fry until soft and a little coloured. Add the garlic, chillies and ginger and fry for another five minutes before adding the spices. Fry for another two minutes then add the vinegar, tamarind and sugar. At this point put the clean, washed and dried jam jars into a cold oven with the lids off. Turn the oven on to 170ºC/gas mark 3 and put the timer on for 20 minutes. When the bell goes turn off the oven leaving the jars inside.

Cook the mixture over a medium heat until you have a thick jam like mixture (roughly 30 minutes). Stir frequently. Taste the chutney. Don’t worry if it’s very vinegary this calm down. Add a little more salt if you think it needs it. Spoon your chutney into your hot jars. Pour a little more oil over the top to seal the jars and screw on the lids. Make some labels and wrap them up. Tell your lucky friends or relatives that their chutney will be ready in a month (a perfect spicy kick for the fag end of January).

Friday, 18 December 2009

Perfect weather for forcing chicory


When salad is scarce, homegrown chicory is a great resource. Because it is grown indoors it is an ideal winter crop for fair weather gardeners who don’t like going out in the cold. I don’t mind having a break from the allotment in winter as even a quick visit to my rather exposed site means icy winds and raw red hands. This doesn’t mean I have to stop gardening. This is the perfect time to bring in your chicory roots and pot them up for forcing. This week I seized the chance of a bright morning and went and dug up the chicory plants I sowed in July. If you haven’t got chicory ready for forcing don’t despair just read on to find out what its all about and put them on your seed list for next year. I’ll leave all the sowing information until 2010. Even if you don’t want to force chicory there are lots of chicory salad ideas at the bottom of this page.
Forcing chicory

If you’ve never forced chicory and a wondering what it’s all about here’s a quick explanation. To force a plant is to make it grow in unnatural conditions (deprived of light) in order to produce faster growth (and paler vegetables). Rhubarb and chicory are both commonly forced vegetables. The chicory that probably first comes to mind is the pale yellow-tipped bulb known in Belgium as witloof, and this is the most reliable forcing chicory. But the red-flecked Italian variety, Rossa di Treviso, is the one I’ve gone for this year. To do all this you have to actually dig up a plant and bring it indoors. You may face resistance from other members of your household who think that bringing large pots of soil into the house is not a good idea. For some people (my husband is one of them) opening a cupboard that usually contains coats and finding a big tub of damp black earth is deeply disturbing and in his case, enraging. I find that serving up lots of different delicious chicory salads helps overcome this response.


Because of our very mild November I’ve had to wait a bit longer this year but generally its fine to do your digging up after the first frost. First dig the roots up carefully. Then trim the leaves down to the roots. Shorten the roots to about 8-10cm. My plants are smaller than other years so I didn’t have much shortening to do but I am still optimistic that I should get some leaves from them.

I don’t have a potting shed so I did my potting up by the kitchen sink but the kitchen table would be fine too. First I got some fairly deep plastic plant pots. Then I filled the pots with old potting compost. I used the handle of a wooden spoon to make holes in the soil and popped the lopped chicory plants in so that just the stub of leaves was showing. I gave them a quick water and put them in a cold, dark cupboard. Then I covered them with an old tea towel as I my coffee sacks seem not to have survived our house move. Old coffee sacks are very useful for storing potatoes and covering chicory and coffee bean sellers will usually sell you their old coffee sacks very cheaply. I get mine from the Monmouth Coffee Company. When the danger of children rootling through cupboards looking for presents has passed I’ll move them to a warmer cupboard. When this happens the heat will cause the chicons to swell and bulb up in about 2-3 weeks (I'll post some pictures). The chicories in the cold will take much longer and by gradually bringing my crop in from the cold I stay in charge of growth. If you have limited space, lay the roots down in damp sand and pot them up as you need them.

Eating your chicory

The bitter, crunchy leaves of raw chicory need strong balancing flavours - rich and creamy cheeses such as goat’s cheese or Roquefort are perfect. The latter is particularly good in the bistro salad mainstay of walnut, chicory and apple. Chicory also stands up well to strong tasting, oily chunks of smoked eel or fish. Salty crispy flavours are another good foil for chicory - crisp squares of bacon and the soft yolk of a poached egg and frisée form another classic salad combination. Sweet sharp juices such as lemon, pomegranate or blood orange combined with creamy nuts such as hazel or walnut work well, as do the tart sour-sweet tastes of balsamic or sherry vinegars and capers. The peppery leaves of rocket and watercress contrast very successfully both in colour and taste. To make the most of chicory’s rigid form you can use the individual leaves of pale Belgian chicory as an alternative to toasts for holding dips such as Swedish prawn skagen with dill in a creamy dressing.

Blanched dandelion, caper and rocket salad

With the bitter taste of dandelion and the peppery taste of rocket, this salad is a good match for smoked mackerel or hot-smoked salmon fillets. If you want to get fancy try growing the striking looking red-ribbed dandelion, with its dark red spine edged by green foliage.

Serves 4 as a side dish

for the dressing
3 tablespoons of single cream
1 tablespoon of lemon juice
1 teaspoon of finely grated lemon zest
sea salt and pepper

for the salad
2 blanched heads of dandelion (make your own by putting a flower pot over some dandelions for a week)
a small bunch of rocket, approx. 100g (flowers too, if possible)
1 tablespoon of capers

Whisk the salad dressing ingredients together and set aside. Wash the salad leaves carefully and dry them. Leave them wrapped in a napkin or paper towel in the fridge until you are ready to assemble the salad.

Arrange the rocket, dandelion and capers in a bowl. Pour over the creamy dressing. Sprinkle with rocket flowers if you have them.

Other chicory family salad combinations


Witloof, Roquefort, slices of pear (or apple) and toasted walnuts.
Crisp green apples cut into thin slices, chicory, watercress and Stilton.
Raddichio, blood orange segments, goat’s cheese and toasted walnuts.
Slivers of smoked eel, baby beetroot or slices of larger beets, chicory and watercress.
Raddichio, toasted walnuts, goat’s cheese and pomegranate seeds.
Dandelion and sorrel.
Frisée, crispy bacon, poached egg and chives.
Chicory, beetroot, orange segments and walnuts.
Beetroot, chopped fine herbes (ideally parsley, chives, chervil and tarragon, but parsley and chives will do too) and endive
Chicory, boiled waxy potatoes, shallots and parsley

Or try, X. M Boulestin’s (the early 20th Century food writer) Salade Carmen – chicory, celery and beetroot in a French dressing made with cream and lemon juice instead of vinegar.

The following makes a mustardy vinaigrette that goes very well with chicory-based salads:
Whisk together:

1 tablespoon Dijon mustard
1 tablespoon lemon juice
3 tablespoons olive oil
sea salt and pepper

Braised chicory

Cooking chicory well so that it is soft with caremelised juices takes care and patience. You will need an hour or so to get the chicories perfectly cooked through. Depending on what kind of vessel you use you may also need to add a very small amount of water. If you find the chicories too bitter you may feel you need to add a little sugar.

1 chicory per person
butter
lemon juice
sea salt
1 tsp of sugar (optional)

Remove any tired looking outer leaves and give the chicory a quick wipe with a clean tea towel. Thickly butter a heavy pan or any nice bit of earthenware that can go on the stove top. The chicory should fit snugly into the pan. Dot a little more butter (1 teaspoon per chicory head) on top and the sugar if you prefer things a little less bitter. Cover with a piece of buttered parchment paper and the lid. Cook over a low heat, turning the chicories every 15 minutes until the chicories are tender and a pleasant golden colour. If they look like they are catching, add a very small amount of water. After about an hour test the chicories with the point of a knife to make sure they are tender all the way through. Squeeze over some lemon juice and season with salt.


Wednesday, 2 December 2009

Dreaming of an Indian vegetable garden

The idea of spending a year in a far off country is one I've been trying to realise for quite a while (without success). Its not the idea of traveling around that appeals to me, its the thought of settling down for a bit, living a different life and getting the chance to cook and grow vegetables in a completely different climate. If growing your own produce changes the way you cook then I can only imagine what growing the produce of another continent does to your understanding of that continent's cuisine.

For now I'll have to settle for growing another country's vegetables on my plot. Ever since I came across a display of vegetable seeds beside the till of a Brick Lane supermarket (a jumble of packets for growing methi and mustard leaves, snake
beans, and pointed gourds) I have been thinking about growing my own snake squash and lablab beans on the allotment.
This year I've finally decided to do it prompted by the book I've started writing with chef Sriram Aylur who's restaurant The Quilon, specialises in a modern, fresh tasting take on Southern Indian coastal cookery.


Before I start growing Indian vegetables on the allotment I thought I'd better get some expert advice. To do this I cycled down to the Spitalfield's City Farm. Situated just behind Brick Lane, the farm - a tangle of sheds, animal enclosures and polytunnels is home to Shetland ponies, donkeys, sheep, pigs and chickens but it'a also where you'll find a gardener of great skill and inspiration, Lutfun Hussain.


For the past 1o years Lutfun has run a gardening group, The Coriander Club. Lutfun is from Bangladesh where there is a long tradition of female gardener cooks. She noticed that many members of her community were finding it hard to source the vegetables they had grown up with and were also finding the transition to inner London living a hard one. The club provides a link to a more rural life as well as masses of the fresh vegetables most often used in Bangladeshi cookery. It seems Lutfun can get almost anything to grow (although she did admit to a failure with henna). As well as kudo (bottle gourd), the Coriander club grows mooli and mustards, snake gourds and naga chillies (the hottest in the world), aubergines, amaranth, chichinga, ribbed gourds, garlic and okra.
Her garden produces food in every season. It is a place of beauty through out the year with abundant marigolds in summer and tulips and cyclamen in Spring.
Lutfun's enthusiasm for her garden was equal to my own. We had much in common as gardeners. We happily swapped lists of the vegetables, fruits and flowers we grow. I have gratefully taken away her recommendations for plants I can grow on the allotment and plan to return with some globe artichoke seedlings for her in the Spring. I also learnt a good tip from her on how to grow coriander that won't run to seed (plant the seed in autumn so that the plant overwinters). The Coriander Club published its own cookbook this September (available at the farm) which also has lots of tips on how to grow Indian vegetables. I will be returning in spring and summer to watch the polytunnels fill up with shield sized gourd leaves and giant pumpkins.

I've put the idea of a real Indian garden on hold. I can still dream that garden, where I would work beneath a hot sun and grow bright flowers, ripe green chickpeas, perfumed yellow mangoes, guavas and finger bananas as well as vegetables unknown to me with strange shapes and stranger names; but for now the intense flavour of those Indian grown vegetables will have to remain just that, a dream.

Wednesday, 4 November 2009

Autumn Salad Leaves


Autumn salad can be the equal (if not the better) of early summer and spring crops. This year a late September sowing into warm ground has given me a luscious crop of young leaves. The self seeded nasturtiums are still going and these can now be added to a salad bowl filled with oak leaf lettuce (froky) giant red mustard, sorrel, treviso, chervil and golden mustard.
The leeks I bought as a bundle of slender green stalks in a French market are doing well. I brought them back wrapped in damp newspaper and inter planted them with Greek cress seeds (labelled mignonette) that I also picked up in France. I have always maintained that I don't really garden in the winter but this year it looks like I am.
It's partly the flowers which keep me going back. There are just so many cosmos still flowering I can't bear not to pick them. I will be recreating Michelle's delicious cob nut and goat's cheese salad (see previous post) and using the mustardy leaves as a peppery base for some slow cooked beef. For lunch I can't resist eating up the sorrel in an open sandwich with spicy matjes herring see below:

Sorrel and matjes herring smørrebrød

Scandinavians, and especially the Danes, love their smørrebrød (open sandwiches) which are usually made with dark rye breads and with an infinite number of toppings. Some of my

favourites include skagen, tiny shrimp with dill, crème fraîche and salmon eggs, gravadlax with horseradish,

or Matjes herring (herring preserved in a sweet, spicy brine). Matjes herring are eaten in Midsummer with sour cream, chives and potatoes. Matjes herring are Dutch in origin but very commonly eaten throughout Sweden. This sandwich takes the traditional combination and adds the lemony bite of sorrel. You will find that the slightly curried taste of the herring is surprisingly

addictive.

1 large slice sourdough rye bread, buttered

sour cream or crème fraîche

1 waxy potato, boiled and thinly sliced

a few leaves of young sorrel, leaves only, washed, dried and cut into ribbons

1 x 210g tin of matjes herring (available from Scandinavian speciality stores and Ikea)

1 hard boiled egg, chopped

a few rings of shallots or red onion, finely chopped or

1 tablespoon of chives, finely chopped

Spread the sour cream or crème fraîche over the buttered bread. Layer the sliced potato on top followed by the sorrel, the herring and finally the egg and onions or chives. This kind of sandwich is best eaten with a knife and fork (and a cold beer).

Sorrel has always been a great salad love of mine but my new favourite is this dark red hearting chicory, Rosso Treviso, which I got from Edwin Tucker seeds. Its a beautiful plant with leaves that gradually turn from green to red as the summer heat leaves the ground. The catalogue records that it is a very ancient variety dating back to the 16th century. Once you've tasted it you'll see why its been popular for centuries. I like it mixed with other leaves or on its own dressed with sherry vinegar alongside a sweetish dish such as pumpkin risotto for a highly flavoured, deeply colourful autumn lunch or supper. Like Witloof it can be lifted and forced indoors to create paler more tender shoots. I will be bringing it in after the first frost. I can't wait to see what colour the chicons turn out to be.

Dinner at La Fromagerie

I love Apple Day (October 21st). It’s a chance to celebrate our many great home-grown apple varieties and remind people there’s more to life than Braeburns and Granny Smiths.

This year, Apple Day was extra special for me, as a Freshly Picked dinner was held at the fabulous cheese emporium, La Fromagerie, in Marylebone. Downstairs in a tiny kitchen, the La F chef, Michelle cooked recipes from the book -

beetroot soup with courgette flowers, apple tart and caraway seed cheese biscuits.


Michelle cooked everything beautifully. She even allowed me into her kitchen to talk to her whilst she glazed tarts and prepared the soup and I did nothing but distract her. Earlier in the day Matilda and I picked some autumn salad leaves at the allotment (in the pouring rain) and these were added to a salad of Kentish cob nuts and heritage apple slices, dressed in walnut oil and served with thin goats cheese toasts.


Patricia Michelson ran us through 8 different British cheeses at their best right now and we drank their delicious house red and some wonderful Normandy cider. Patricia is so extraordinarily informative and passionate about her love of cheese. It was a thrill to meet her and I had a lot of fun. I even managed to pull off a cheese biscuit making demonstration with some back up from Pat. So a big thank you to Sarah, Michelle, Pat and all the waiting staff for a really special occasion. I hope the rest of the guests enjoyed it as much as me.


Photographs by Toby Rhind-Tutt.


Wednesday, 30 September 2009

Apple Day Event October 21st 2009

To celebrate apple day I am very excited to be co hosting an event at the wonderful Marylebone cheese shop and restaurant La Fromagerie with Patricia Michelson. I will be talking about my book and demonstrating my recipe for caraway seed cheese biscuits.

Patricia will conduct a tutored tasting of the best Autumnal cheeses from the British Isles, paired with homemade caraway seed biscuits and spiced apple chutney. Each course will be paired with cider and wine.

There will be a dinner of seasonal produce (some from the allotment) and some delicious heritage apple varieties. At the moment the menu is beetroot soup with courgette flowers followed by a salad of bitter leaves with toasted cobnuts, crisp apples and hot ryefield toasts.To finish there will be flat apple tart glazed with a sour jelly.